Thursday, 25 June 2015

Creating with Inktense !!

Morning my lovelies !!!

Tracy here with a post for the 'A Sprinkle of Imagination' design team

Do you have art supplies that you purchased because you just 'had' to have them ???....... Come on, own up !!
I know I do....all those lovely supplies that I 'needed' desperately at the time and then have hardly if ever used since.....sometimes I think I could set up my own art store with the amount of unused arty loveliness!!!!

No more !!!! ( alright who am I kidding !!) but I've decided that I need to start using things that I buy, play and explore all these gorgeous new mediums, experiment and justify their purchase !!!


So this week I decided to get out my inktense pencils, which I'm ashamed to say I've had for approximately 3 years and only ever used the black 'tut tut'

I started by sketching in the basic outline of my girl, I didn't want to do anything too complicated, after all this was all about the pencils.....
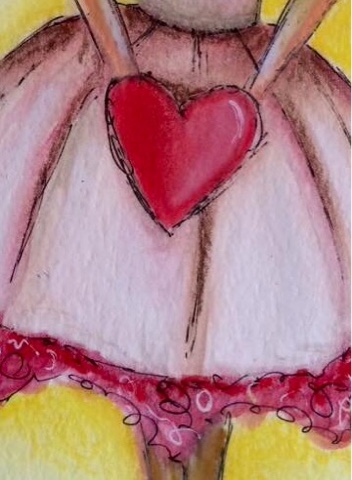

The colours of the pencils are amazing and even though I only used a few colours the amount of depth I could get with them was great by adding more or less water or by using them direct to the page...


I used a thin black fine liner to add in some final sketchy details. 

I love how my girl turned out and I am in awe of these pencils. The colours are intense and they are super easy to use. 


Ok I'm off now to see what other purchases I can justify !!!

Have a fabulous day
Bright and painty hugs
Tracy
X

Friday, 19 June 2015

PCB Design Team Post - Be Free

Good morning !!!

I'm here with my latest post for the 'Premium Craft Brands' design team

My PanPastels hadn't come out very often before I joined the design team so I've taken the opportunity to play play play and see what they can really do !!

I have quite a distinct acrylics painting style and know how I like my pages to look and was curious as to whether I could produce something equally pleasing with a completely different material......


I started by layering dry PanPastel with the sponge applicators to get a smooth all over blended coverage


I then scraped some of the pastel dust onto a craft mat and mixed with water to produce a pigmented watercolour paint and then began painting in my circles and shading 


I stamped the fabulous Tim Holtz butterfly onto my page and then went over it with the PanPastel paint that I had made and my ranger fudeball black gel pen. I wanted a rougher more sketchy look to my butterfly to match in with my page. To add some gold highlights I picked up the pastel with a dry brush and brushed it over my butterfly and areas of my page to give it some shimmer. 


To finish off I used some white and black acrylic paint to add highlights and shadows as well as a bit of finger painted dots (I love a bit of finger painting !!)

I'm really pleased with the results and I  hope today's post inspired you to give PanPastels a try, I'm going to certainly keep playing and see what else I can come up with

Happy playing

Bright and painty hugs
Xxxx

Sunday, 7 June 2015

PanPastel Postcard

Good morning lovelies !!

Glad to be here with you today with my latest design for the 'Premium Crafts Brand' design team

This week we are all creating postcards using our delicious PanPastels and what's more all of the postcards will be given away as prizes this week.....

Wahoo !!!!!


For my postcard I have used the following PanPastel colours.....

Violet
Magenta
Permanent Red Tint
White
Coarse Black

I blended the colours from the lightest in the centre to the darkest around the edges and used a sponge tool to blend between colours. 

I added some stamping to the background in black and also stencilled through a Tim Holtz stencil with coarse black PanPastel. 

Next I added some Dina Wakley turquoise acrylic paint and painted in some circles, outlining each with Rangers black fudeball pen and doodling inside with a white signo gel pen. 


Next I stamped with Tim Holtz magnificent butterfly stamp (I loooooove him !!!) and added some of the turquoise acrylic and white gel pen to the wings. 


I used the coarse black PanPastel to add shadows around the painted circles and butterfly and then finished off with Tim Holtz rubons 

Thank you all for stopping by and if you want to be in with a chance to win this postcard then please leave a comment below to be entered into the draw. 

Bright and painty hugs 
Tracy
X

Friday, 5 June 2015

Mixed Media Angel !!

Good morning everyone Tracy here with today's post for 'The Sprinkle of Imagination' design team ......

I've been practicing my drawing skills for a while now and when I started out I desperately wanted to be able to sketch and paint an angel in my art journal, like so many of the beautiful pages I'd seen on the web and popping up in my facebook newsfeed !!!!

Well I practiced practiced and practiced some more until I felt that I could finally attempt one in my journal. 

I started out this page using a mix of golden acrylic paints in diarylide yellow and yellow ocre as well as Dina Wakley's umber for the background, I added the large stencil words to my spread using Finnabair's matte gel and then highlighted the words by rubbing over with Dina's Umber acrylic.......

 
I then started to sketch in my angel and block out with Dina's white gesso to give me a good base to work on, the facial shadows were painted with golden acrylic paints in titan buff and yellow ocre and then the details were added with coloured pencils......


Her beautiful pink hair was painted with Dina's magenta mixed with white and the edge of her wings were painted gold with Rangers Gold paint dabber.....


I finished my page with gold highlights......well every angel should shimmer.....shouldn't she ??

Thank you for stopping by, I am over the moon with my angel and am looking forward to creating many more

Bright and painty hugs
Tracy
Xxx

Sunday, 31 May 2015

Fabulously Finnabair !!!

Hello my friends.....

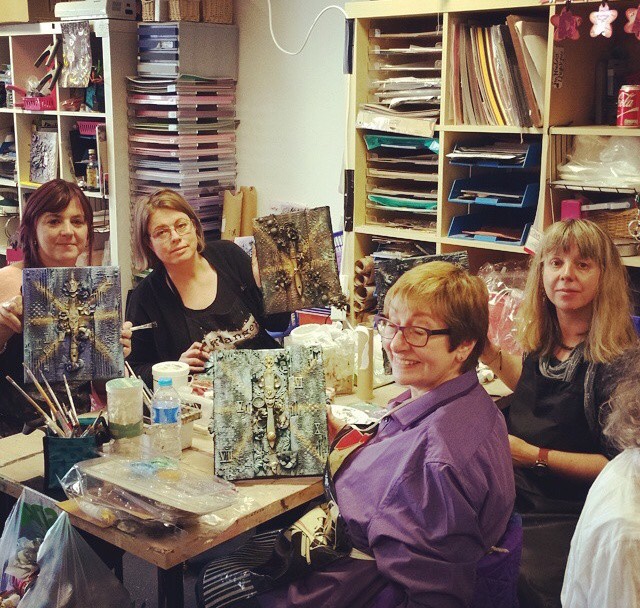
I have had the most fabulous weekend at Art from the Heart taking two workshops with the amazingly talented Finnabair!!!

Ania is an amazing teacher and a super cool lady who is obviously very passionate about what she does. 

I attended two workshops on Saturday and created two lovely canvases.....


I don't usually create with lots of dimension but Ania explains everything so clearly it makes it easy to achieve spectacular results.....


Haha beavering away adding all the elements for the texture before painting !!

 
The second workshop was my favourite, a three dimensional canvas called 'The Artifact'
We covered lots of techniques and I got to try lots of products that I hadn't used before (the graphite sand was amazing)


Work in progress!!!!


Ta dah ...... All finished. Everyone did a fab job. 

If you've never been to one of Finn's classes and get the chance I would highly recommend them. 

A fabulous day with a fabulous teacher and a fabulous bunch of ladies in the class......it doesn't get better than that !!!

Wednesday, 27 May 2015

Decorated file folders !!

Hello all you lovely people out there, Tracy here with today's mixed media Wednesday for The Mixed Media Mojo design team.....

I was recently involved in a 'Happy Mail' swap with some ladies in the USA and we had to send a decorated envelope with some goodies inside for the recipients. I didn't have any envelopes big enough for the items I wanted to send so decided to decorate some file folders and use those as my envelopes...


I started by gessoing the folders on all sides, once dry I started adding random colours of acrylic paint covering all of the outsides of the folders. 


I continued by adding some stamping and stencilling and painted in some circles to add interest. I then painted in a white panel on the front for my address label....


I used a white gel pen to add some finer details like highlighting the stars and scribbling some words into the background. 


I finished off by using a photocopy of  a previous red haired girl from one of my journals cutting her out and gluing her down on the front of my file folder. I finished off by going over the whole thing with matt medium to seal everything and make it more hard wearing for the long journey across the pond. 

This was such a fun project to do and I can let you know now that the recipients were over the moon with their decorated file folders and even better they can recycle them into a storage solution for their 'most important' papers of course. 

Thanks for dropping by today. I hope I have inspired you to give this great project a try

Bright and painty hugs
Tracy
X

Saturday, 16 May 2015

Painted Canvas Shoes

Hi lovelies !!
Tracy here with today's post for the 'A Sprinkle of Imagination' Design Team !!

So I've had a few days off from the day job this week to have a bit of a spring clean and whilst going through the wardrobe found an ugly pair of black pumps that had hardly been worn (because they were ugly, I don't like ugly things....see where I'm going with this !!). Well I was just about to toss them away and thought I might be able to do something with them........

Ta da !!!........


Not looking so ugly now ay !!

I started by covering all of the canvas parts with a couple of thin layers of gesso allowing the layers to soak into the canvas and build up slowly....


Once completely dry I added my base colours using Dina Wakley's fab acrylic paints in Lime (used for the tongue see pictures of completed shoe), Turquoise and Magenta, again applying them in thin layers to build up the colours, I used Dina's fabulous brushes for this job. The bristles are stiff enough to get into to all the fabric of the canvas and give a good coverage .....


Once I was happy with my colours I started to sketch my design, first in pencil and then went over in a black waterproof marker, I decided for my first attempt not to try anything too complicated and just go with simple shapes and patterns....


When I was happy with my design I took a small brush and black and white Dina acrylics and began painting in the detail tidying up after with the black waterproof marker.....


I used a splatter stamp and some black archival ink to stamp onto the pink parts surrounding the lace holes and down the back of the shoe and then used a white fine line paint pen to add my finer details, sealed with 3 thin coats of modge podge and allowed to dry thoroughly, finally I raided my ribbon box and found the perfect piece to use as my laces

I'm sure you'll agree that they certainly don't look ugly anymore !!!!


Thanks for stopping by. Hope you are inspired to give it a go. Have a fabulous week

Tracy
X